
.jpg)
Since a friend of mine recently described these little bows as my "signature item" (Yes, Katie, I'm talking about you), I decided to start my new blog with this easy tutorial. I started making these bows a few years ago as baby shower gifts. A little while later when I found out I was expecting my own sweet girl, the manufacturing exploded. These bows are just perfect for toddler pigtails and babies and are so versatile! Let's get started.
You will need:

- Hot glue gun
- Floral wire
- Wire cutters (I use old scissors)
- 3/8" wide ribbon (if you are new to this try using a grosgain ribbon- it seems to be the easiest to work with)
- Hair barrettes (I find that these are cheapest at a beauty supply store like Sally's- around $6.50 for 100 barrettes)
- Scissors
Begin by deciding how big you want your finished bow. I tend to like them to be just larger than the barrette. Fold your ribbon to form a loop a little more than half the size you want your finished bow to be.

Next, bring the other side of the ribbon so it lays on top of your first end. You'll want the two sides to overlap. This makes your first full loop.

Now make another loop next to the first one. You'll do this by continuing the end of your ribbon around the back of the bow and bringing it up and over the top following the line of your first loop. Make it just slightly longer than the first loop.


Keep going by crossing over the first loop in the center and continue to form a loop next to the first.

Do the same thing again to make your third loop. When you make your third loop, make it the same length as your first loop, just slightly shorter than the middle loop. This will help give your bow a nice shape.

When you have all three loops made, check to make sure that they are even and the length you want them to be. This will be the best time to make adjustments.

Now it's time to wrap your bow with the wire. Without letting go of the three loops, take the end of the wire over the front center of the bow

Using the hand that is not holding the bow, bring the short end of the wire around the back and twist it around the long length of wire

Twist a couple more times to tighten it so that everything is nice and secure.

Trim the wire and bend it to the side so that it no longer sticks out. This side will be the back of your bow.

Now, cut the excess ribbon close to the wire. I find if I cut it at a diagonal it is easier to hide later.
The loops of your bow are done! If your bow doesn't look perfect here, you're normal! Keep practicing, it takes a few tries to get the hang of it.
Now take a break to get your toddler to stop using butter as lotion / eating it straight from the dish...
You may be able to skip this step :)

Now to cover the wire and form your center. Simply tie a single knot, just as if you were going to start tying your shoe.
Cross the ends

And loop through

Now pull it gently until it forms a pointy little knot. Usually it will naturally just come into this shape, though sometimes you may have to manipulate it a little. You can either stop here,

Or tighten it just a little more for a smaller knot, depending on the look you want.

For this bow I used the smaller knot.

Put a drop of hot glue in the center of the bow on the front side (the side without the twisted wire and raw edges).
Warning: Hot glue guns are hot! Please don't burn yourself...
Warning: Hot glue guns are hot! Please don't burn yourself...

Lay your knot on top of the hot glue so it's centered.

Now place another dot of hot glue on the center of the back of the bow.

Wrap the shorter length of ribbon over, pull it tight and place it on the hot glue. Hold it tight for a minute until it's set.

Trim the end that you just glued down right up against the bow.

Now place a dot of hot glue on top of the end that has already been glued to the back of the bow.

Fold the other end on top of it, pull tight, and hold it for a minute until it's set.

Trim this end.

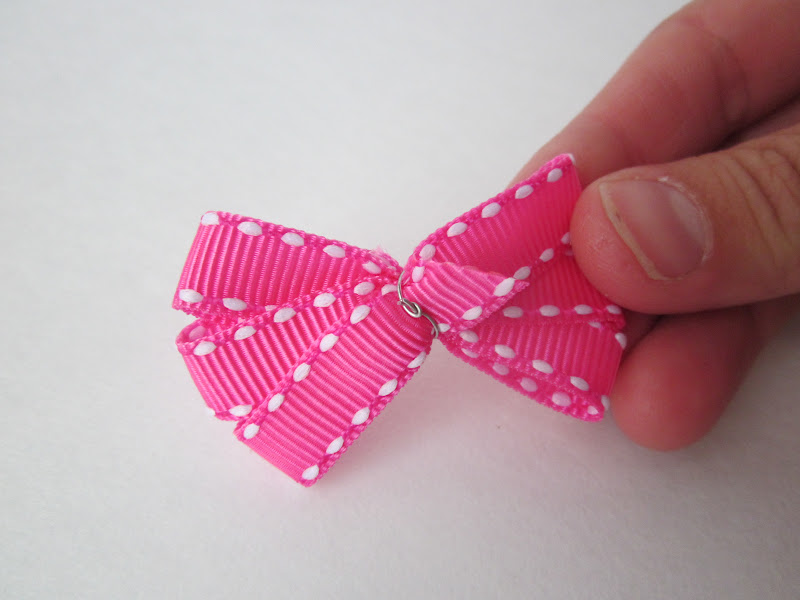
And voila! Now you have your bow!
Front:

Back:

Now it's time to cover your clip. I have found that when the bow is glued straight to the metal barrette it tends to fall (or get pulled by little fingers) off the barrette so I always do this step, though I guess it isn't absolutely necessary.
First, I just run the hot glue gun across the raw edge of the end of the ribbon without squeezing. This helps get just enough glue to keep the edges from fraying.

Place small dot of glue on the back end of the barrette (this is the flat side of the barrette).

Place the end of the ribbon on the glue, placing the end of the ribbon about at the level where the hinge of the barrette is.

On the inside edge where the two sides of the barrette hinge together, place glue on each side of the barrette. Be careful not to get glue on the spring as this will make the barrette hard to open.

Push the ribbon down inside like this.

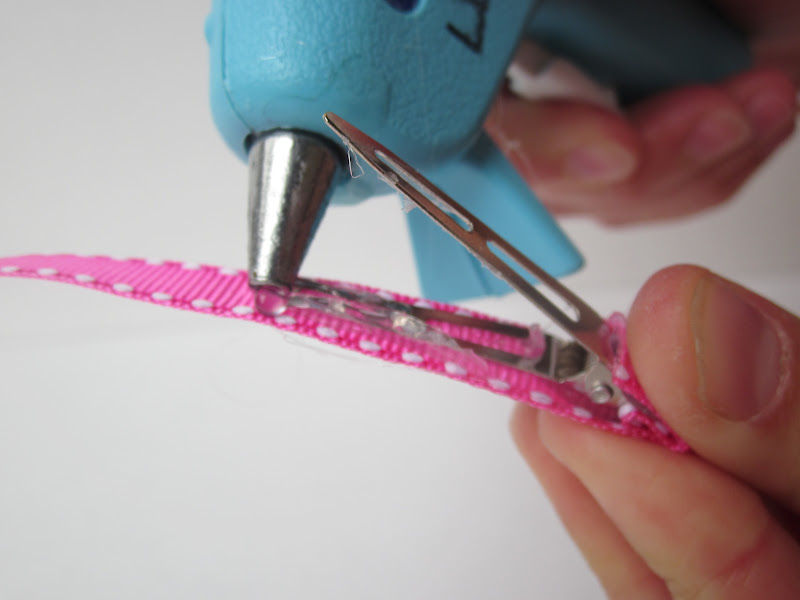
Now place glue all long the top side of the barrette (the bent piece of the barrette).

Bring the ribbon over,

Push the ribbon down and then open the barrette while the glue is still wet. This will keep the two halves of the barrette from getting glued together.
Usually it will get a little hot glue on the bottom half like this, just wipe it away with your fingers.


Measure how far around the bottom of the inside you want your ribbon come, I usually go just a little short of where the hinge is.


Open your barrette again and while holding it open place a strip of hot glue along the barrette, right on top of where you just put ribbon.
Fold the ribbon around the bottom of the barrette and push it down, wipe away any hot glue that may have come out from in between the two layers of ribbon. Scrape any glue remnants off the bottom piece of the barrette with your fingernail. I purposely don't cover the bottom piece of the barrette because I find it makes the barrette difficult to slide into hair or headbands.

This is what it looks like when you're done.

Now add a strip of hot glue to the top of the barrette.

Center your bow on top and press it down, hold it for a few seconds until it sets.

That's it. Hooray, you're done!

Front:

Back:

Insert finished bow into a crocheted headband or into the hair of the cutest little girl you can find.
This part isn't hard for me to do :)

Now repeat over, and over, and over. I have learned to make the bows in sets of three. One for each pigtail and one to lose, because inevitably that's what happens in the land of children.
Once you get the basic bow down, the possibilities and combinations are endless!
Once you get the basic bow down, the possibilities and combinations are endless!
Other ideas to try:
Try using the more pointy knot.


Or maybe no knot at all.

Perhaps add a button in the center

Play around with different widths of ribbon and number of loops.


Or maybe just keep it simple


You'll end up making hundreds!
Believe me, I know.


